
When I research for a book, I spend a lot of time looking at the front and back of embroideries. I don’t look at the backs to see how neat or how messy they are (though many are surprisingly messy, and we could do well to realise that the neat-back-police haven’t always existed!). I look at both front and back because it helps me to learn how the stitches were made. If I only have the front, I have to make assumptions about how it was made.
Take long armed cross stitch and herringbone stitch, for example.
This is long armed cross stitch.

This is herringbone stitch.
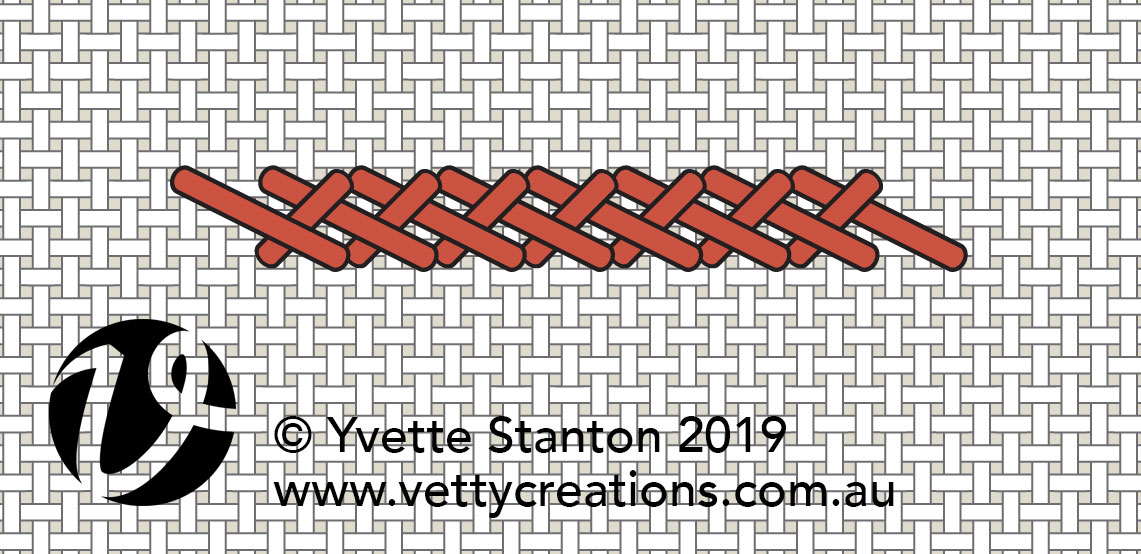
See the difference? No? That’s because there isn’t any difference on the front.
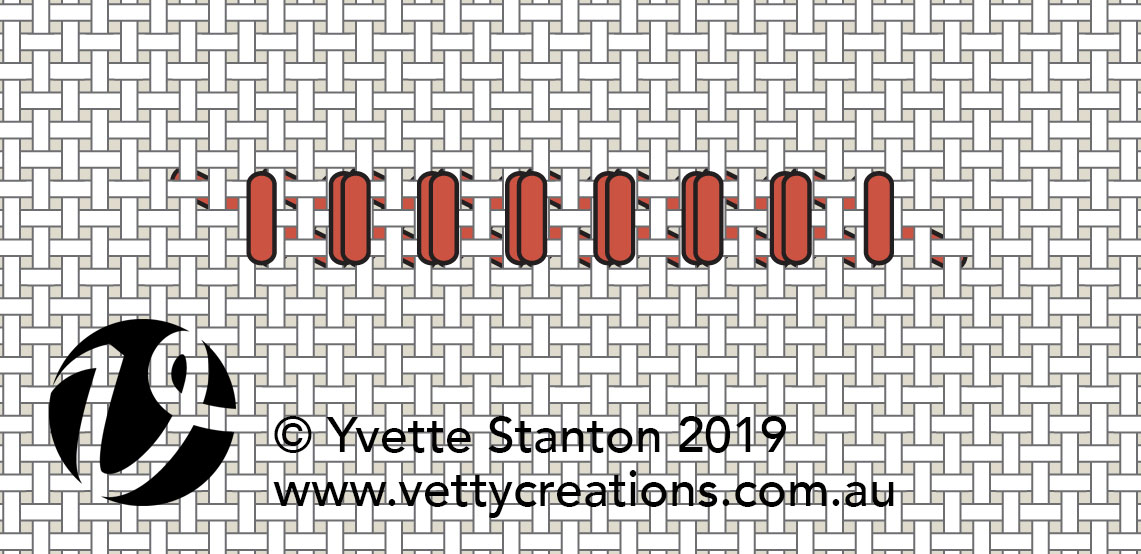
This is the back of long armed cross stitch.
This is the back of herringbone stitch.
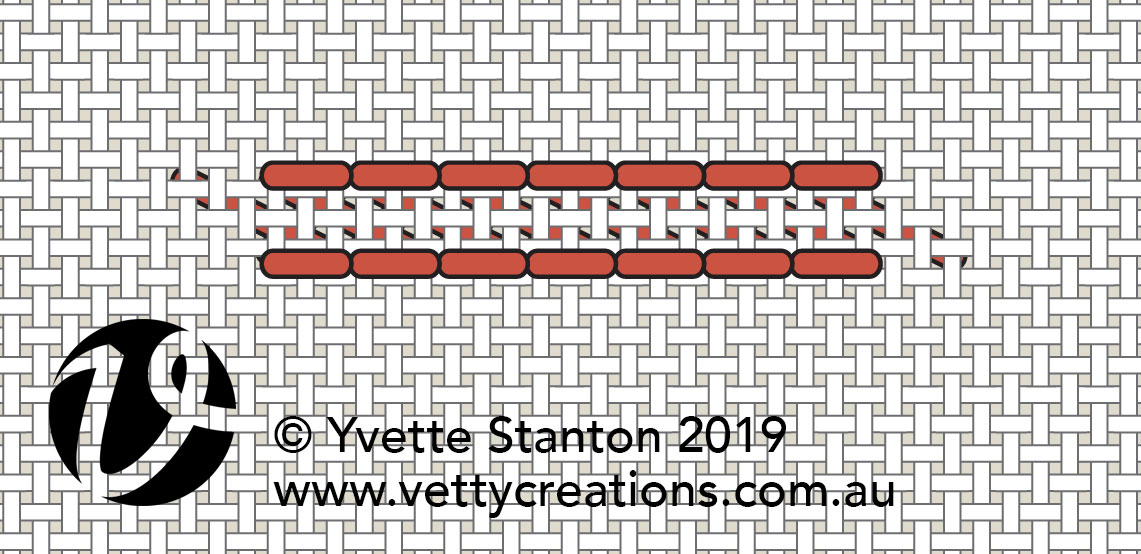
See the difference now?
This is why it is important to look at both the front and the back of a stitch when trying to figure out how to recreate it.
 White Threads is the blog of Yvette Stanton, the author, designer, publisher behind Vetty Creations' quality needlework books and embroidery products.

I wrote about these two when researching the medieval chasuble at St. Paul in Austria. In fact, there are some other minor differences between the two stitches when you use them as filling stitches. The herringbone does not butt up as nicely as the long armed cross-stitch does.
Were they worked as counted or non-counted stitches? I think herringbone stitch lends itself much more to being non-counted than long armed cross stitch, and that might be where some of the difference lies. Also the way the stitches sit on the front due to the way they sit on the back.
Both! And they used the long armed cross stitch for the whole piece. These medieval copes are so fantastic; there is not a spot that’s not covered with a long armed cross stitch.