Vetty Creations header

Back to Vetty Creations website

White Threads

Couldn’t wait to show you all

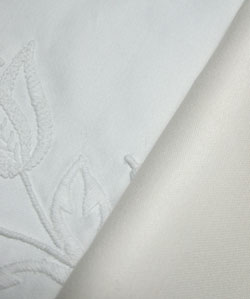
Portuguese whitework embroidery class projectHere is the completed embroidery that I have been working on over the last few days. I know that I said that I wasn’t going to show you yet, but I couldn’t wait!

Isn’t it gorgeous? (Not commenting on my stitching here, rather the actual style!) It is Portuguese whitework embroidery.

When I first saw my first photo of this style of embroidery, I was gobsmacked. It was like nothing I had ever seen before, and so stunningly beautiful. I said right there and then, “I have to learn more about that embroidery!” And so I did.

To Terry, who wondered yesterday why I was doing the drawn thread work first (great question!) because to her that would destabilise the fabric, you can now see why I had to do it first. It forms the framework for the rest of the embroidery, not unlike Casalguidi, as Carol so helpfully pointed out in yesterday’s comments.

This is just a very small sample of this style of embroidery. For those of you who want to see more, I am now LETTING THE CAT OUT OF THE BAG: this is what my next book is going to be on. 😀
September 23rd, 2010 | Category: Introducing..., Portuguese embroidery, whitework, writing books | 19 comments

Planning a class

Yesterday I spent some time planning a project for a class next year. The class is possibly going to be on a type of Portuguese embroidery, but to get the shop to agree, I need to show them an example of what I mean. In this case, that means stitching it. How sad, to have to do some stitching… 😉

I’m working with a gorgeous fabric: 38 count white Nuovo Ricamo linen. Its so yummy! Its beautifully woven, with a heavy weight, and little space between threads, so it doesn’t look gossamer thin like some linens do these days.

The embroidery has drawn thread work and surface embroidery. At this stage I’m only up to the drawn thread work. The surface embroidery will come later.

What fun!

September 22nd, 2010 | Category: designing, making stuff, teaching embroidery, whitework | 5 comments

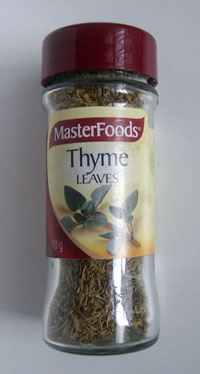
More *thyme*.

thyme leaves
Yesterday I mentioned my need of more time to get everything done. Well, quite coincidentally yesterday afternoon, a friend passed on something from another friend who had been clearing out her kitchen before moving house to another state.

Thyme leaves.

More “thyme”.

Oh dear. What a terrible pun! 🙁

But do you think it will work?! (ever hopeful, aren’t I?)

I did get some work done on my book yesterday though, which was a nice change.

Reminder: If you would like to join our Christmas ornament swap, all the info you require is here, and that’s where you can sign up too.

September 21st, 2010 | Category: embroidery musings, writing books | Leave a comment

more time?

I’ve been re-reading the Harry Potter series lately. I think I really could do with one of the Time Turners that Hermione has in their third year, so that she can have hours over again to get more done.

Seriously, I think I need to clone myself. For yesterday’s post, I needed to go searching through my files to find a photo of the organza Hardanger ornament. In doing so, I found my files for another Hardanger book that I started way back before I got sick with pneumonia and CFS. And I realised just how much of the book I had already written and prepared.

Then there’s the other book that I am “currently working on”, which would lead you to believe that progress is being made. Well, that would be nice! Unfortunately at the moment I just don’t get the chance to work on my own stuff – I seem to be spending most of my time preparing things for magazines and classes.

I either need another me, a time turner, or be more efficient with the time I have. Arrghh!!

Ok. Whinge over.

But if you do have any suggestions on how I can handle it all, I’d love to hear from you! 🙂

September 20th, 2010 | Category: embroidery musings, writing books | 2 comments

Hardanger christmas decoration

Hardanger Christmas ornament
To help get you in the mood for our Christmas ornament swap (which will definitely go ahead as we already have a number signed up), I thought that you might like to see some of the ornaments that I have designed and made in the past. If you’d like to join in our Christmas ornament swap, there’s details and you can sign up here.

This is a design I did a few years ago for The Gift of Stitching magazine. It features a band of Hardanger embroidery which is sewn up so that it becomes a pyramid (or maybe technically a tetrahedron, actually).

But the most unusual thing about this design is that the linen has an overlay of organza which gives the whole thing an added sparkle. It adds an extra challenge to the stitching, but is a technique that brings very traditional Hardanger further towards contemporary embroidery.

I have this design available for purchase as a pattern so that you can make your own Organza Hardanger Ornament.

September 19th, 2010 | Category: Christmas ornament swap, designing, hardanger, making stuff | 3 comments

Christmas decorations swap?

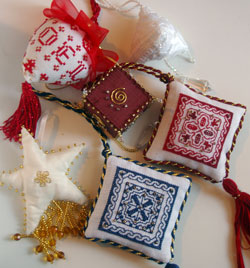
Christmas ornaments

Some that I have received (the two lovely ones on the left) and others that I have made


Every year I make Christmas decorations as gifts for my husband’s staff, my daughters’ teachers and instructors, and for some special people. It usually ends up that I need to make between 10 and 20, and its something that I usually really enjoy doing. I’ve already started this year’s ones as they’re a great small project to take to my daughters’ swimming lessons, piano lessons and trumpet lessons. I can get the embroidery done for a couple a week.

I make different ones every year. Sometimes they’re in Christmassy colours, and sometimes they’re not. I’m not too fussy about that. I think an ornament can be beautiful at Christmas even if it is not in red, green, white or gold! One of my husband’s staff decorates her home in red and gold for Christmas, which means that some years she is exceptionally happy with the latest edition to her collection!

Would anyone like me to organise a Christmas ornament swap for the readers of this blog? I’ve been part of some through various forums before, and I’ve always found them to be great fun. It is truly delightful receiving an ornament from someone, somewhere else in the world. You could use your own design, one of my designs, or one of someone else’s design.

I’ll make a cut-off date for people to join, and then draw names out of a hat to allocate who is sending to whom. Later on, you’ll need to send me your address (which I will treat with kindness and respect, and certainly NOT add to any mailing list!) so that I can distribute addresses to the appropriate givers. You need to be prepared to take into account international postage, international posting times, and customs and quarantine requirements of other countries, as while you may be allocated a recipient in your own country, there’s every chance that you will not!

If you’re going to join, make sure that it IS something that you can commit to. There is nothing worse than going to all the effort of making and sending out an ornament to find that someone else can’t be bothered and therefore makes it a less than happy experience for their recipient. To add to the fun, until you receive your ornament, it will be a secret who yours is coming from. However, you are welcome to blog about the ornament you are making, because none of the other recipients will know if they’re the one that’s getting it!

If you’d like to be involved, add your name in the comments section of this post. Yes, it is a little early in the year to be thinking about this, but if we get it started now, it will impinge less on the end of the year rush that so many of us get caught up in.

September 18th, 2010 | Category: Christmas ornament swap, embroidery musings, making stuff | 12 comments

Fluttery butterflies

Yesterday I spent the day drawing butterflies. Last week I asked my husband to bring home a pile of books on butterflies from the library that he works at. I spent the morning looking at the books gathering information.

Then I drew butterflies, and more butterflies. They are such pretty creatures!

The butterflies are to go on a curtain that a magazine has asked me to do. Because of the type of stitches I’m going to use, I needed to simplify the drawings down to plain line drawings with only a little patterning.

Because I don’t have a scanner, I took photos of my drawings and loaded the photos onto my computer. I then traced over the photos in Illustrator, so that I had neat line drawings. I was then able to resize, flip, move and turn the butterflies into a pleasing design.

The design has now been submitted to the magazine for approval, and when its okayed (which may be after some changes) I’ll go ahead and stitch it.

It was very relaxing to spend the day with butterflies. Happy sigh.

September 17th, 2010 | Category: designing | 4 comments

a school holiday project

We have school holidays coming up here quite soon. I’ve planned that I will do some creative things with my daughters then.

The other night at the opening of the Stitch+Stitch=Magic exhibition I was talking with a lovely lady, Gail Davis, who had felted the background for her embroidery. I asked her a bit about felting, as its something that I’d like to try. We talked for a bit, and she mentioned that she recently felted with a 4 year old relative of hers. It made me think that it would be a great thing for me to do with my daughters during our upcoming holidays.

She suggested a reasonably priced place to get wool tops for felting with – Virginia Farm Woolworks. I checked out their prices compared to other places, and they did indeed seem very reasonably priced – about half the price of most other places.

So on Tuesday I went onto their website and chose 4 different coloured wool tops, and rang them and ordered them.

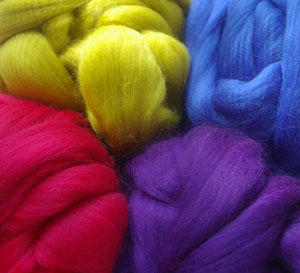
Virginia Farm Woolworks wool tops

Clockwise from top left: Wattle, Royal, Purple, Raspberry


They arrived yesterday (the next day) which is great service! I was so pleased with the yummy colours, and the wool is so soft! I’m keeping it all a surprise for my girls for now, but I think we’re going to have fun being creative and getting wet!

I’m also trying to justify why I should give it a go before I try it with the girls. Surely I need to have tried and understood the process before trying to do it with others?! (If you’re having trouble reading between the lines, I just can’t wait to give it a go!)

September 16th, 2010 | Category: making stuff | 5 comments

Coloured contours

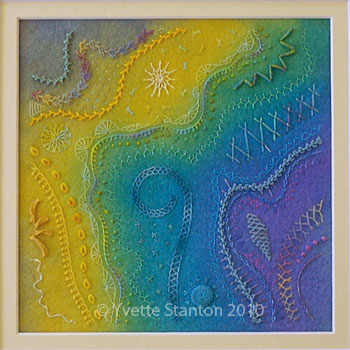
On Monday evening I went to the opening of the Stitch+Stitch=Magic exhibition at Craft NSW, in The Rocks, Sydney. My embroidery “Coloured Contours” is part of the exhibition.

As part of the rules, it was not allowed to be previously published, and to me that meant I couldn’t show it to you here on my blog either. But now that it is in public view, I figure that its now ok for me to share a picture with you!

Coloured Contours by Yvette Stanton

Coloured Contours by Yvette Stanton


There were some really gorgeous embroideries as part of the exhibition and two in particular really caught my eye:

  • “Strata 1” by Gail Davis, which had nuno felting, with hand embroidery using silk, cotton and metallic threads. It was beautiful!
  • “Dandelion Gone” by Jaci Heyman. This was set up so that it caught your eye as soon as you walk in the door. And it was VERY eye catching! It had four parts, each depicting a dandelion being blown away in stages, using silver metallic threads.

If you are in Sydney any time until 26th September, do go and visit the Stitch+Stitch=Magic exhibition at 104 George Street, The Rocks, Sydney. 9:30-5:30, 7 days.

September 15th, 2010 | Category: embroidery stitches | 3 comments

SAL: boiling Mountmellick embroidery

Boiling Mountmellick embroidery?! Why?

The fabric that we have used for the Mountmellick embroidery stitch along is the gorgeous high-quality 100% cotton satin jean fabric. It comes slightly off-white. At the completion of the embroidery, we boil it to finish whitening off the fabric. It is only a subtle difference, but it definitely does make a difference.

The boiling is done at the completion of the embroidery as I believe that if you do it before, the fabric can become too hard to get the needle through. I can’t say I’ve ever tried boiling before embroidering though – I’m just happy to go along with what others have told me, as far as that is concerned! I do boil before sewing on the knitted fringe though, as I don’t want it to all get tangled. However, as this is what would be done with old Mountmellick embroidery to get them back to white, there is no reason why it can’t be done. I just prefer to save myself the hassle of untangling!

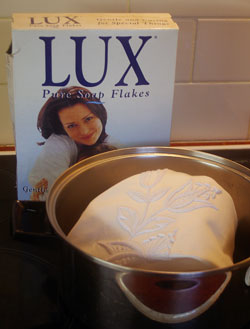
ingredients and equipmentTo boil the embroidery you will need a largish pot for the stove, pure soap flakes, a stove, a spoon for stirring, and the embroidery. You can see from this photo that the white of the stitching is more white than the fabric, which has a more yellowish hue. This is what we are endeavouring to get rid of.

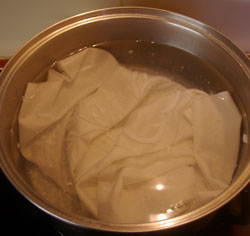
soapy water prior to boilingPut the embroidery in the pot and cover it with a good amount of water. Add a slurp of soap flakes – yes, very exact that, isn’t it? Enough to make it soapy, but not so many that there are bubbles everywhere! In the photo you can see the flakes of soap floating around. There are more than that, they’re just down the bottom and under the fabric. There’s no need to try to make them dissolve by stirring lots, as they’ll dissolve of their own accord in the warming water.

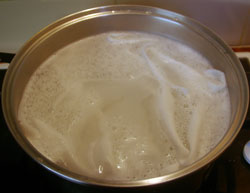
boiling water with soap sudsTurn the stove on, and bring the water to the boil. I usually leave the lid on, set the oven timer for about 10mins (unless you have a large quantity of water that will take much longer to boil) and go away and do something else. When the timer goes off, I come back and check it, and give it a swish. Usually its not quite boiling yet, so I just hang around, making sure it all stays in the water and doesn’t float up out of the water too much. There’s no need for constant stirring as the fabric is 100% cotton and therefore won’t melt even if it touches the bottom of the pan.

When the water is boiled, carefully empty the water into the sink. (Its hot, so be careful, ok?! I accept NO responsibility for burns and scalds. Sorry!)

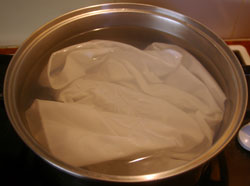
refilled with fresh waterRefill the pot with water. Set it to boil again. The water will probably cloud up again, from the soap residue that is still in the fabric. When it boils again, empty the water, and refill again.

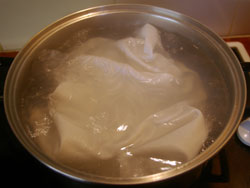
boiling againKeep boiling and refilling, until the water no longer clouds up with soap. Empty the water and rinse the embroidery. Hang out to dry, then press from the back.

For the amount of soap that I used, and the quantity of water, I had to boil mine four times to get it to clear. You may need more or less times depending on the quantities you use.

two different whitesYou can see a subtle difference in the two fabric colours here. The embroidered one is slightly whiter than the other one, so you can see that boiling does make a difference.

If your Mountmellick embroidery ever becomes less than white, it can always be boiled white again, using the same process. Do NOT boil the embroidery if your fabric is not 100% cotton though, as you will risk it melting or warping in the heat.

September 14th, 2010 | Category: hints and tips, mountmellick embroidery, stitch along, whitework | 5 comments
« Newer Entries  
  Older Entries »
Yvette Stanton White Threads is the blog of Yvette Stanton, the author, designer, publisher behind Vetty Creations' quality needlework books and embroidery products.

New book now available!

Hardanger Filling Stitches
Hardanger Filling Stitches by Yvette Stanton. Order your copy today!
Find us on Facebook

Archived posts

Categories

  • book reviews (88)
  • Christmas ornament swap (13)
  • colour (6)
  • crazy hair (6)
  • customer embroidery (49)
  • designing (119)
  • dressmaking (26)
  • Early-Style Hardanger (91)
  • Elegant Hardanger Embroidery (42)
  • Elizabethan embroidery (25)
  • Embroidery classes (189)
  • embroidery musings (436)
  • embroidery stitches (206)
  • errata notices (11)
  • Ethnic embroidery (49)
  • exhibitions (111)
  • exploring the needlework internet (10)
  • favourite needlework items (69)
  • FlossTube (102)
  • Frisian whitework (73)
  • goldwork (12)
  • hardanger (232)
  • Hardanger Filling Stitches (1)
  • Hardanger Filling Stitches (72)
  • hints and tips (114)
  • historical embroidery (119)
  • how-to videos (34)
  • illustration (1)
  • Inspirations (25)
  • Introducing… (90)
  • left handed embroidery (78)
  • magazines (10)
  • making stuff (271)
  • merezhka (35)
  • mountmellick embroidery (176)
  • Mountmellick Embroidery: Inspired by Nature (60)
  • mountmellick supplies (49)
  • new products (104)
  • online book previews (7)
  • pattern darning (19)
  • pattern drafting (11)
  • photography (2)
  • Portuguese embroidery (166)
  • Portuguese Whitework: Bullion Embroidery from Guimarães (74)
  • public thanks (32)
  • published projects (27)
  • Punt 'e Nù (32)
  • Sardinian Knotted Embroidery (77)
  • sewing tips (9)
  • Smøyg (41)
  • Smøyg: Pattern Darning from Norway (39)
  • soapbox (6)
  • stitch along (44)
  • stitch dictionary (45)
  • teaching embroidery (192)
  • The Left-Handed Embroiderer's Companion (104)
  • The Right-Handed Embroiderer's Companion (70)
  • travel (172)
  • Ukrainian Drawn Thread Embroidery (35)
  • Uncategorized (169)
  • video previews (5)
  • White Threads Blog (91)
  • whitework (364)
  • writing books (306)